Network Setup on First Computer |
|
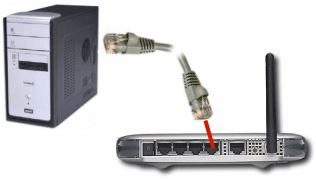
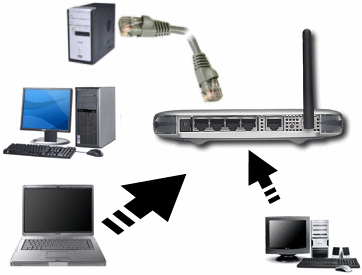
After establishing the physical or wireless connections of the computers, you can electronically connect them, test or check that they can "see" each other. Microsoft Windows XP makes networking ridiculously easy. In fact, when writing these lessons, after physically connecting the computers to the router and turning everything on, the whole network had been built and there was no particularly necessary configuration to perform: everything was ready. Still, in the next few sections, we will pretend that the network is not (yet) working. To "virtually" connect the network, Microsoft Windows XP provides the Network Setup Wizard, which is a series of dialog boxes that can guide you in this process. To start this wizard:
 Practical Learning: Wirelessly Connecting a Network |
|
- On one of the computers that runs either Microsoft Windows XP (HE or Pro), click Start -> (All) Programs -> Accessories -> Communications -> Network Setup Wizard
- The first page of the wizard will present a message and a bulleted list but nothing to choose:
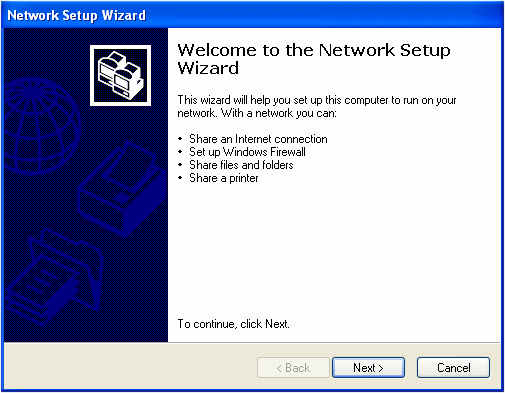
Read the text and click Next
- The second page of the wizard also displays a message:
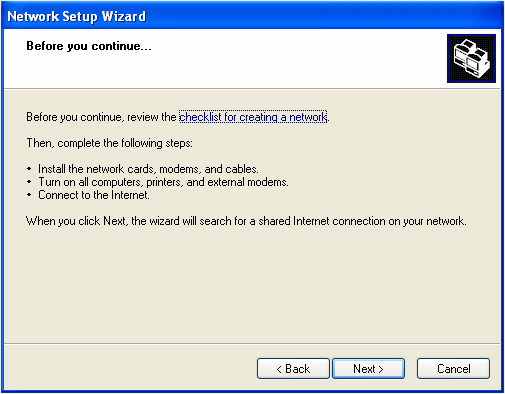
Read the lines of text and click Next
- In the third page of the wizard, if you have already created a connection to the Internet, you can accept the first radio button. If you haven't gotten or configured a connection to the Internet, as is the case for the computers in our series of lessons so far, click the second radio button:
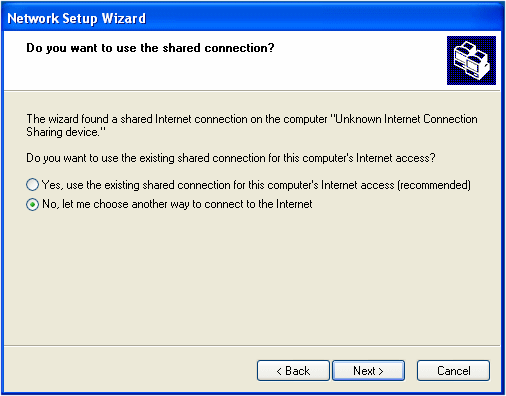
- Click Next
- In the fourth page of the wizard, as we are not dealing with the Internet at this time, click the Other radio button
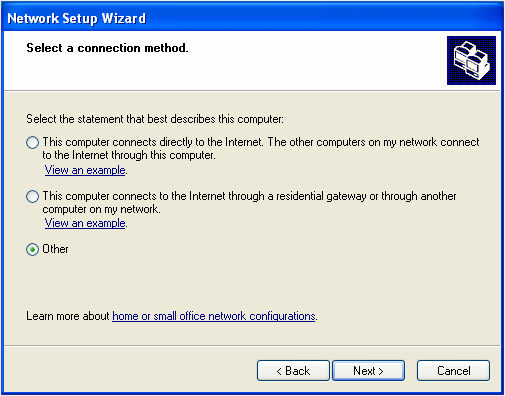
- Click Next
- In the fifth page of the wizard, read the options of the three radio buttons. Because we are not setting up, or concerned with, the Internet right now, click the This Computer Belongs To A Network That That Does Not Have An Internet Connection radio button
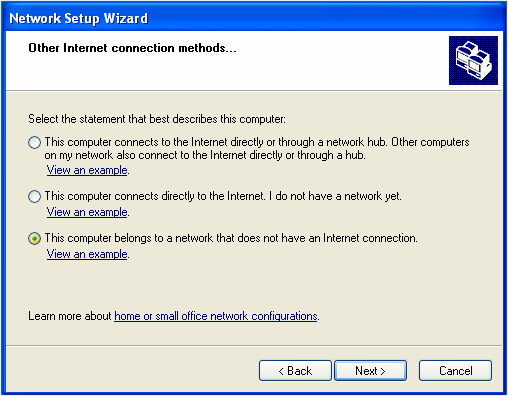
- Click Next
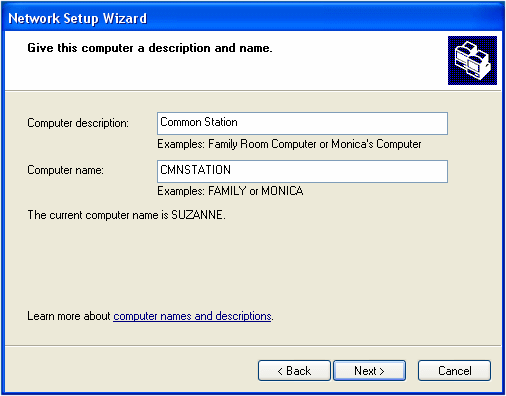
- In the sixth page of the wizard, in the Computer Description text box, type a short description such as the role or the position of the computer. There are no real rules to follow for this text, only suggestions. For example, because this description will show in Windows Explorer or other windows, don't make it too long. You can also include any characters you want
- In the Computer Name text box, type a name for the computer. For this name, there are rules you must follow:
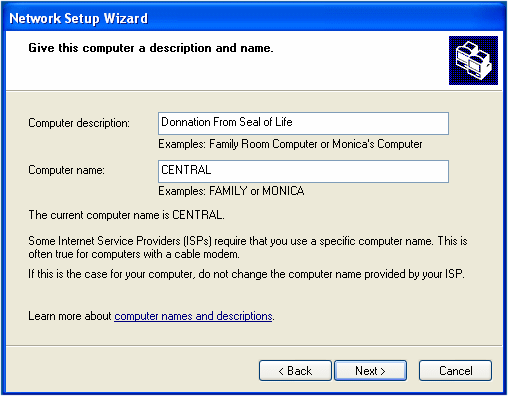
- After entering the description and the name of the computer, click Next
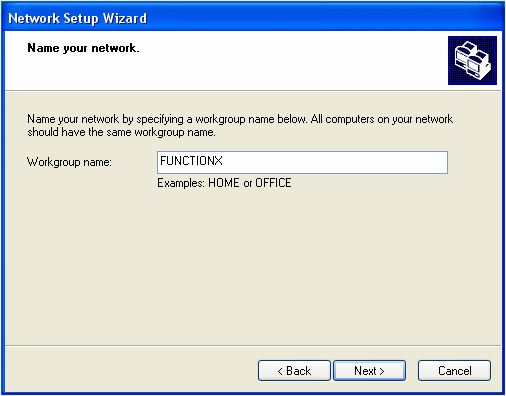
- In its seventh page, the wizard prompts you to enter the name of your network. It suggestsMSHOME. You can accept this name or change it:
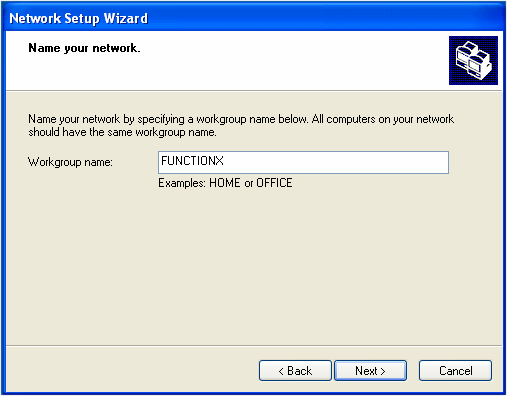
- After typing a name for the network (you can still change the name later), click Next
- In the eighth page of the wizard, read the text:
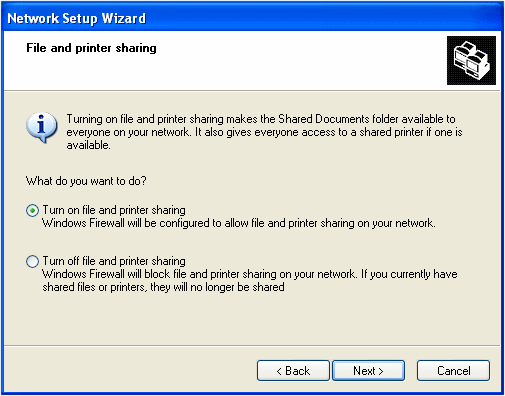
For our project, accept the Turn On File And Printer Sharing radio button and click Next
- In the ninth page of the wizard, read the text:
Click Next
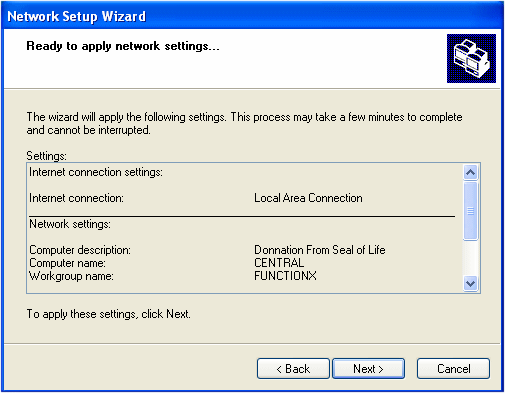
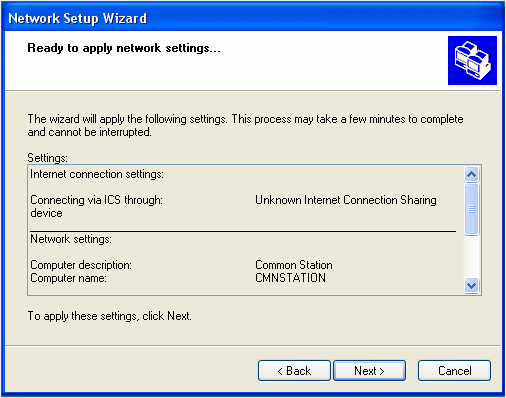
- After clicking Next, the wizard will start creating the files used to setup a network, based on your previous selections:

When it has created the files, it would present a new page of the wizard.
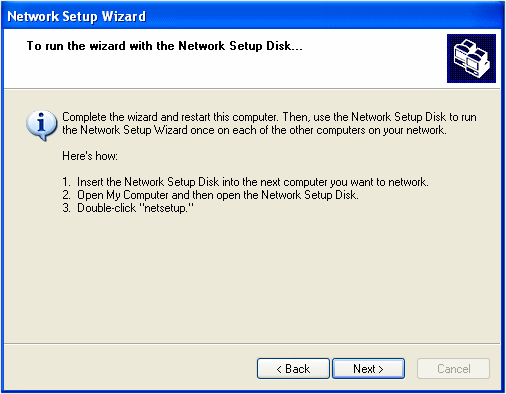
In the tenth page of the wizard, read the text. Normally, you should create a setup disk:
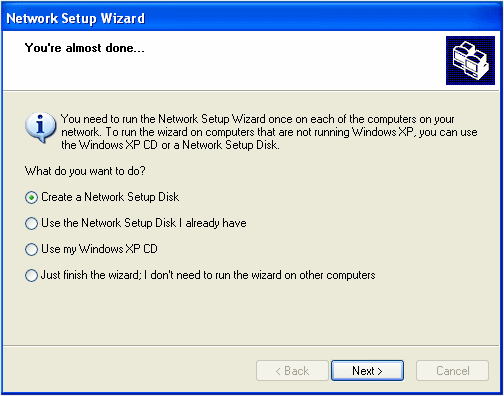
To create a setup disk, you will need either a floppy drive or a flash drive (also called a jump drive) (or any portable drive that the computer allows).
For our lessons and if your computer has a 3.5 floppy drive, accept the Create A Network Setup Disk radio button. Click Next
- In the eleventh page of the wizard, you may be presented with the only portable medium available. If your computer found more than one medium, such as a floppy drive and a flash drive, you would be presented with the option to choose which one you would use. Here is an example:
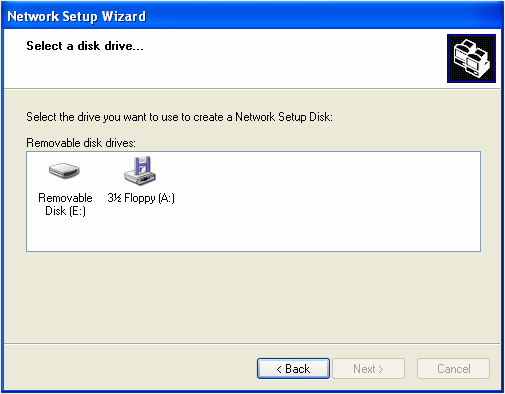
If necessary, select the drive you would use and click Next. If you select the floppy drive, make sure you insert a floppy disk in the drive. The following page would ask you whether you want to format it, which you should do:
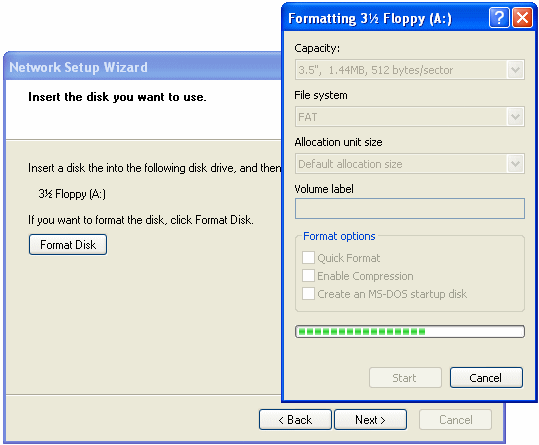
and click Next
- After clicking Next, the wizard would copy the necessary files in the medium (flash drive or floppy). After copying the files, it would give you instructions on what to do next:
After reading the instructions, remove the disk and click Next
- In the last page, read the text:
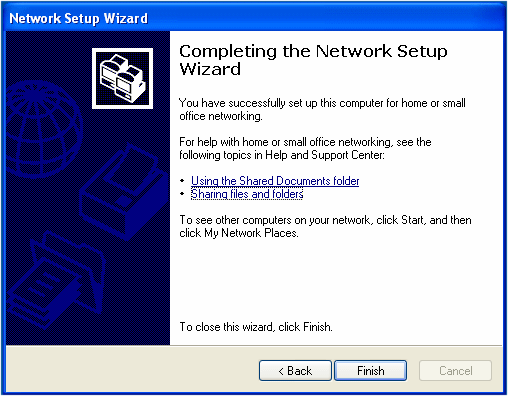
Click Finish
- After clicking Finish, a message box will ask you whether you want to restart the computer:
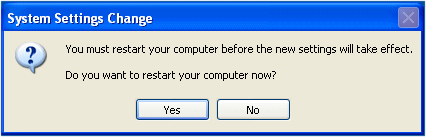
Click Yes
Network Setup on Additional Computers |
|
After setting up the network on one computer, you can continue with the next computer. You two alternatives: you can use the same network wizard or you can use the setup disk you would have created. To setup the network on the other computer(s) that will be part of your network:
Practical Learning: Connecting Additional Computers |
|
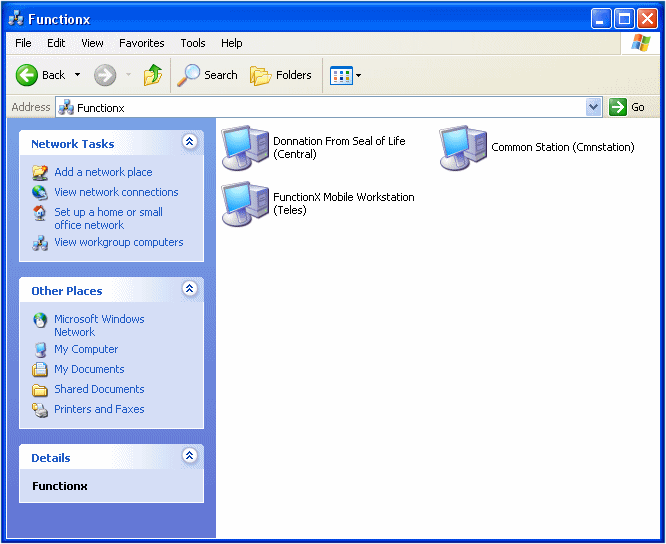
- On the next computer, click Start -> Network Places
- Under Network Tasks, click Set Up A Home Or Office Network
- In the first page of the wizard, read the text and click Next
- In the second page of the wizard, read the text and click Next
- In the third page of the wizard, accept the first radio button and click Next
- In the fourth page of the wizard, in the Computer Description text box, type a short description that can define or indicate what this computer is used for
- In the Computer Name text box, type a name that will distinguish this computer in the network. One of the rules you must observe is that the name must be unique in the network. This means that you cannot use the same name you have already given to another computer in the same network:
- After entering the description and the name of the computer, click Next
- In the fifth page of the wizard, it is somewhat important (but it is not a requirement) that you enter the same name you specified for the network of the first computer:
If you specify a different name, you will end up with various networks, which can be annoying or confusing but would work fine
- After entering the name of the network, click Next
- The wizard will try to check if that name was already specified for another computer of the same network. If it finds that another computer is using that name, then it would allow this computer to "join" the network. If it finds out that no other computer is using that name, then it would create it.
After checking the name, the wizard will present you with a summary page:
After reading it, click Next
- The wizard will then create the necessary files to make this computer part of the network. After creating the files, it would present a page giving you to option to create a setup disk. This time, decline by clicking the last radio button
- Click Next
- Click Finish
- You will be asked whether you want to restart the computer or not. Click Yes
As an alternative, and as instructed when creating the setup disk: - On the other computer, put the setup disk in the drive
- Using Windows Explorer, My Computer or another file utility or viewer, access the drive that contains the disk you created and double-click the file it contains
- Follow the instructions on the screen. They are pretty much self-explanatory
- When asked to restart the computer, do so
| |

No comments:
Post a Comment